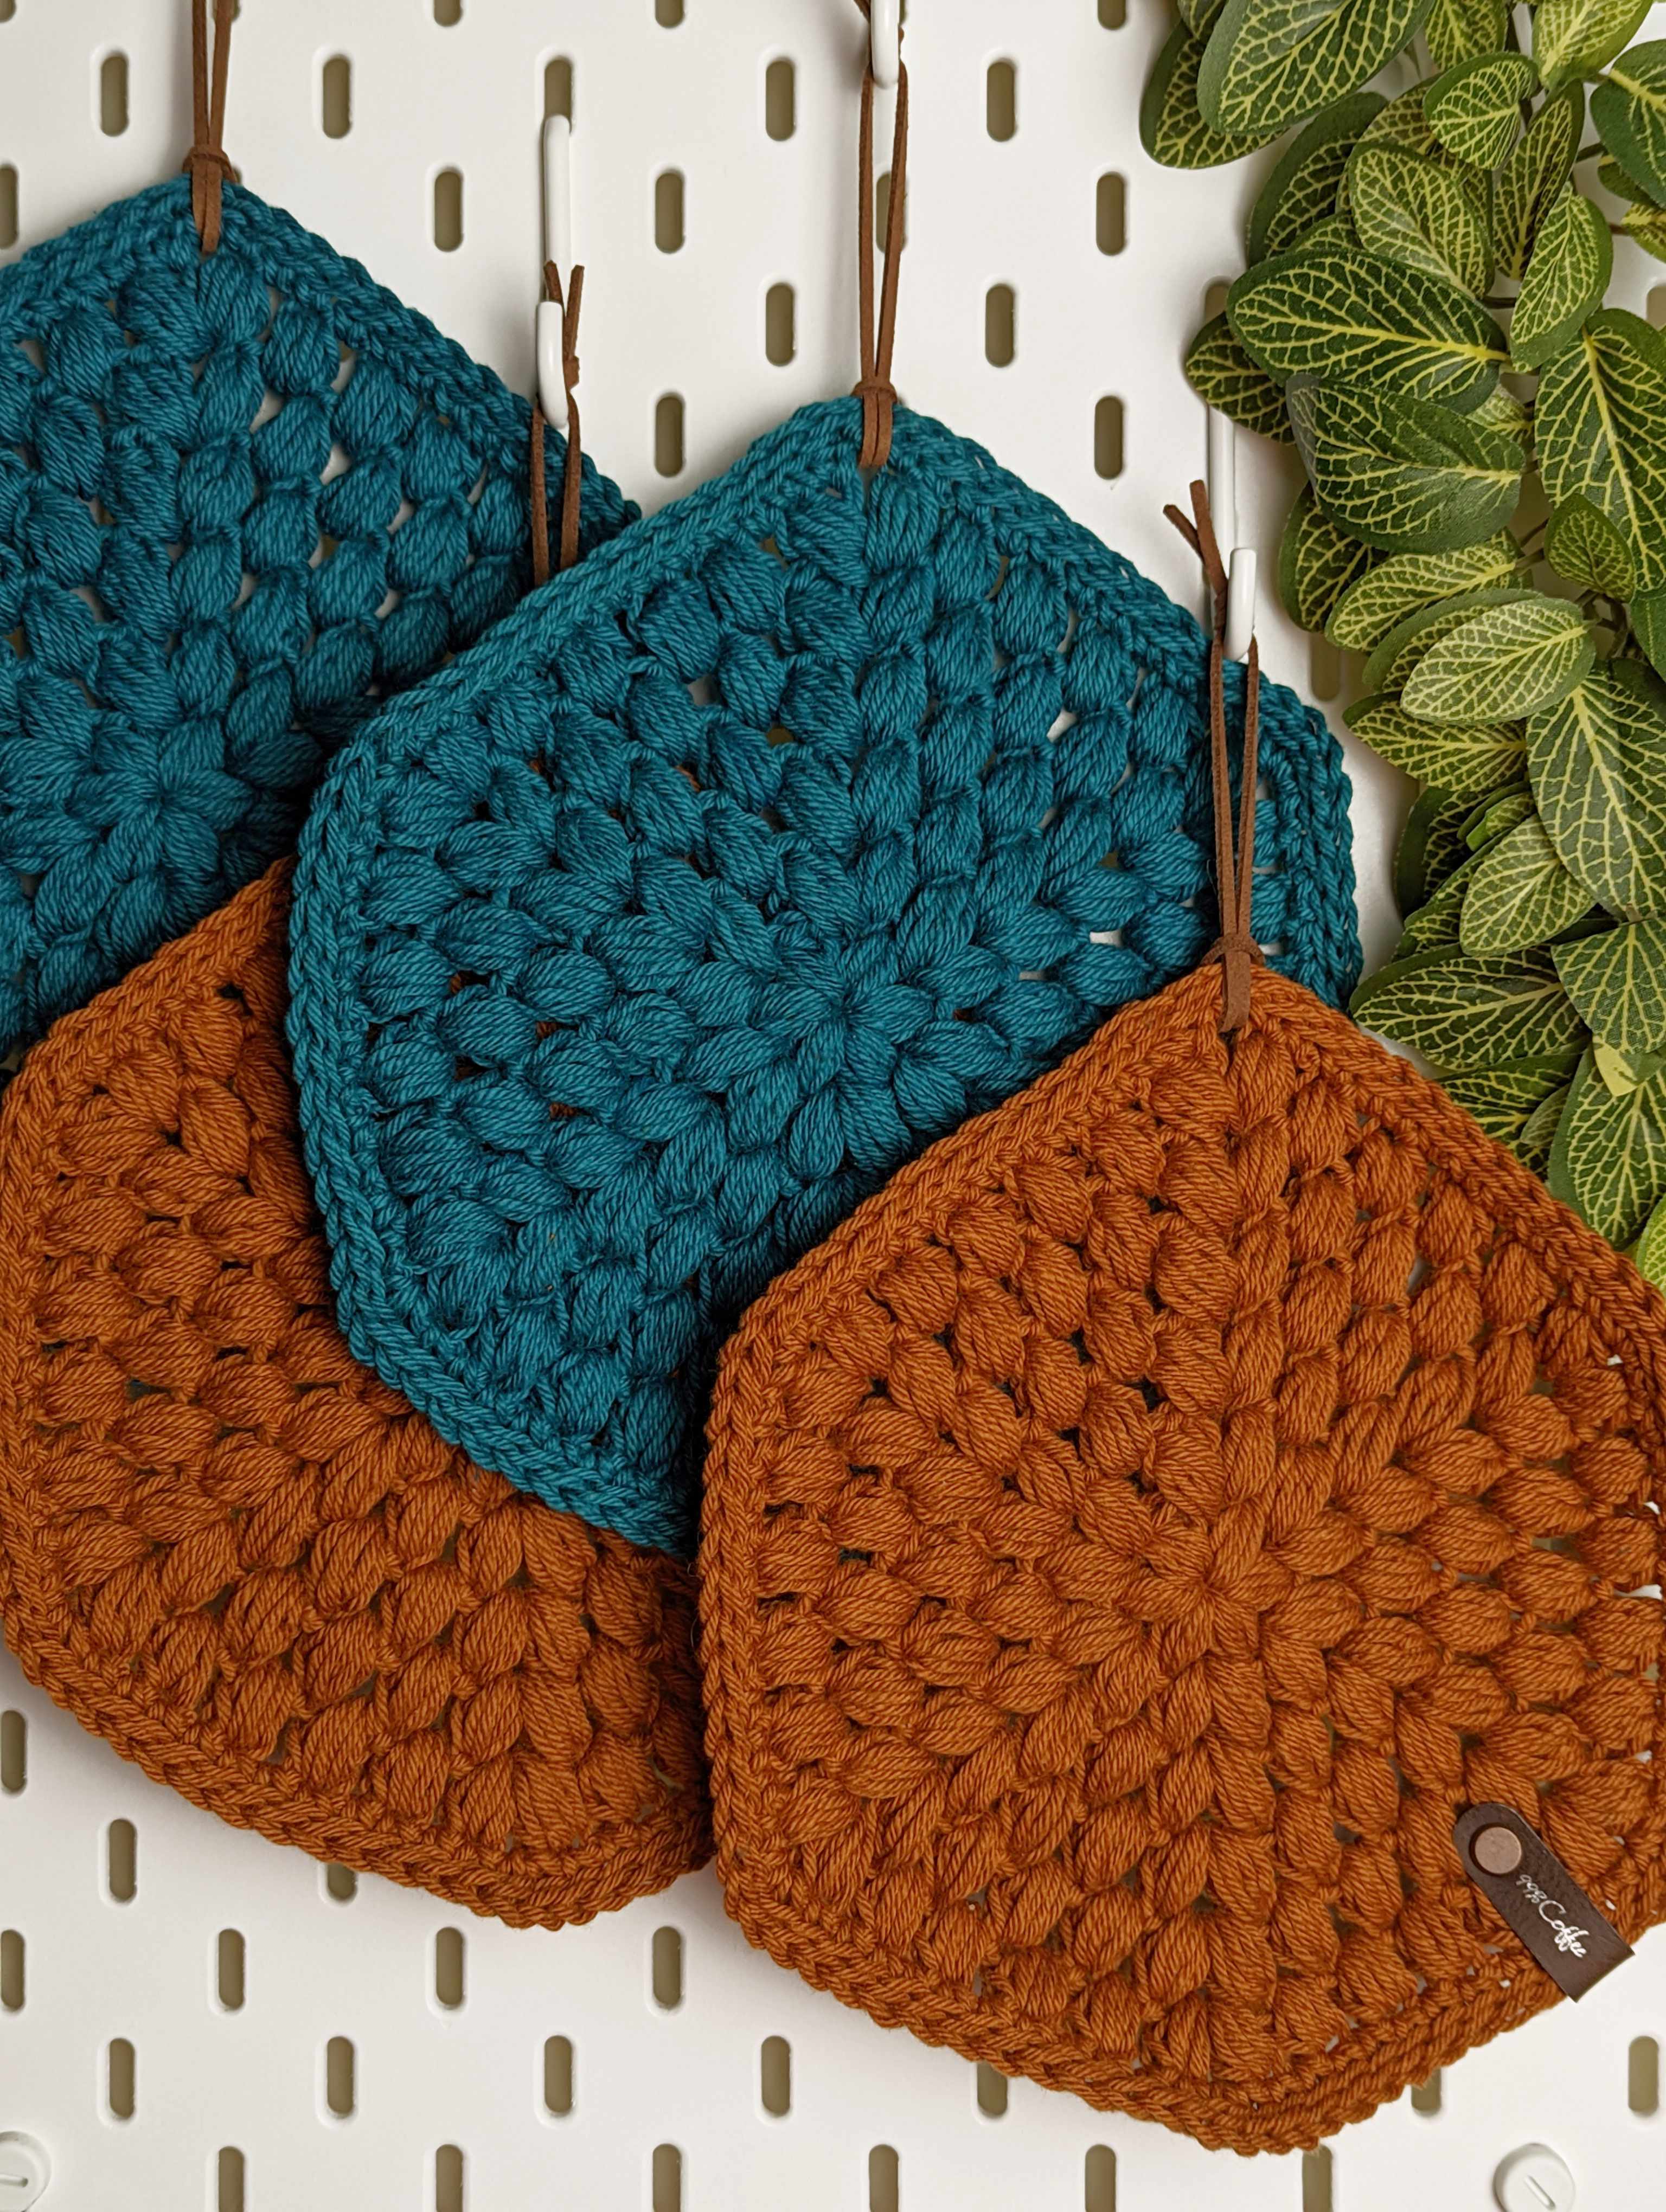
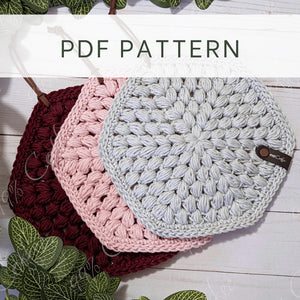
These Fancy Puff Trivets are a bit of a spin on an old classic of mine - the Fancy Puff Coasters! This time, with a bit of a new shape and look.
In keeping with the Fancy Puff Coasters, we have the same beautiful puff stitch texture and combine it with the Sl St through the back loop border. This time, we have a bit of a different shape though.
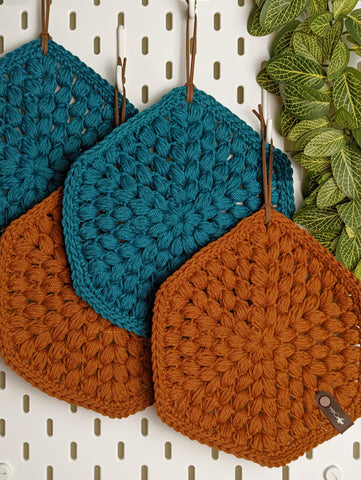
While the coasters were round, this updated Trivet pattern features a hexagonal shape. Not only is it unique, but it's perfect for a matching set with the coasters that doesn't match too much.
Materials
You will need the following:
- Knit Pick's Dishie Yarn (1 ball)
- ~75-85 yds of yarn total
- US H/8 - 5.00 mm Hook
- Tapestry Needle for weaving in ends
- Scissors
- 5 removable stitch markers (optional)
Note on Yarn: While the materials state 1 ball of yarn, you will not need a full ball of yarn. Each coaster comes out to just under 75-85 yds of yarn total.
While not required, I chose to use Knit Pick's Dishie for its wide range of colors, softness, and durability. This would look lovely in other cotton yarns as well, though!
Pattern Notes
- Each trivet comes out to about 8" by 7.2" with about a .25" thickness to each trivet.
- Due to the nature of these trivets, I would suggest these as use for protecting countertops and tables, but I would not recommend these for removing hot items from the oven. Think of the fingers!
- I did not focus too much on gauge for this pattern, but if you are looking at following my gauge, work 4 rounds and take a measurement - this fourth row should be around 4" across
Special Techniques
You will need to know the following techniques for this pattern:
You can camouflage the Ch 3 at the beginning of the round a bit by working the first Puff Stitch of each round behind the Ch 3 bar. It may look funny at first, but it should even out as you continue through the rounds.
Abbreviations
- Ch(s): Chain(s)
- Sl St(s): Slip Stitch(es)
- St(s): Stitch(es)
- SC: Single Crochet
- TBL: Through Back Loop
Pattern
Create a magic ring, Ch 2
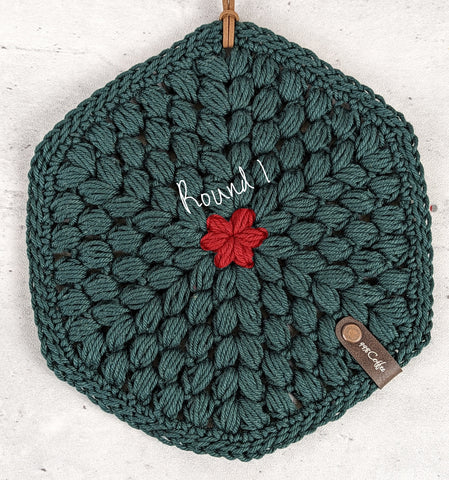
Round 1 [6 Puff Stitches Total]
Inside of your magic ring, create 6 puff stitches. Sl St into top of Ch 2.
Rounds 2-6 are all done in the Ch 1 spaces between puff stitches.
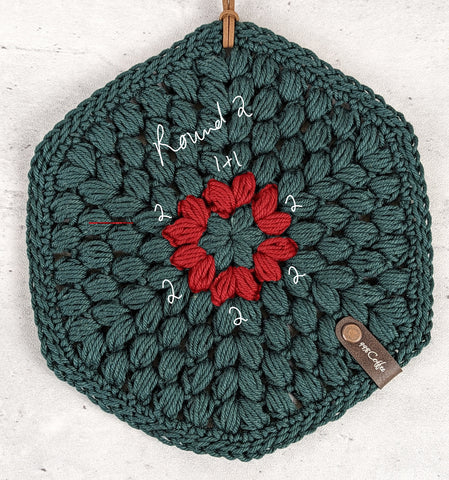
Round 2 [12 Puff Stitches Total]
Before beginning, check the pattern notes for a quick tip on how to camouflage the chain 2 at the start of each round.
Ch 2, 1 puff stitch into same St. In each Ch 1 space between previous round’s puff Sts, 2 puff Sts. This will increase the round evenly around. Continue making 2 puff Sts in each of the Ch 1 spaces from previous round until you reach the first Puff St of the round.
Before closing off the round, 1 Puff St in same St as first Puff St. Sl St into top of Ch 2. Each Ch 1 space of the previous round should have 2 puff Sts worked into it, increasing the round by 6. Sl St into top of Ch 2.
Get the Ad-Free PDF of this Pattern
Support my work by purchasing the ad-free PDF version of this pattern! With your purchase, you'll receive:
$3.50
- The Ad-Free PDF version of the Fancy Puff Trivet Crochet Pattern
- Instant Digital Download on your chosen platform
- The Pattern written in U.S. Terms Only
- Pattern Support with Savannah via e-mail for any questions
Just want the free version? No problem, just keep scrolling!
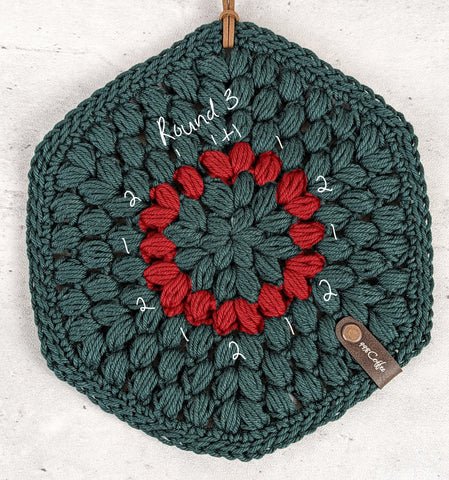
Round 3 [18 Puff Stitches]
Ch 2, 1 puff St into same St. *In next Ch 1 space between previous round’s puff Sts, 1 puff St. In next Ch 1 space, 2 puff Sts. Repeat from * until you reach the first puff St. Finish off the round with 1 more puff St into the same St as the first puff of this round, increasing the round by 6 total. Sl St into top of Ch 2.
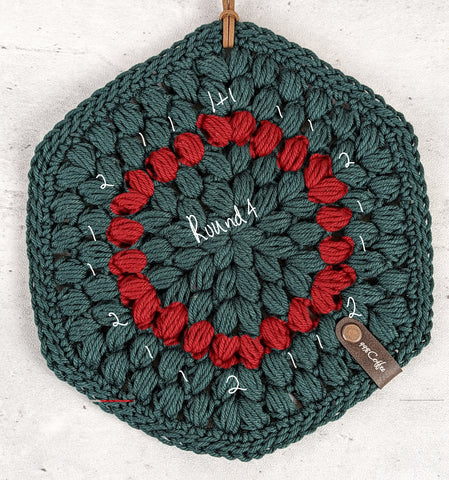
Round 4 [24 Puff Stitches]
Ch 2, 1 Puff St into the same St. * In next 2 Ch 1 spaces between previous round's Puff Sts, 1 Puff St. Into the next Ch 1 space, create 2 Puff Sts. Repeat from * until you reach the first puff St of the round. Create 1 more Puff St into the same space as the first puff St of this round to finish off, increasing this round by 6 total Puff Sts. Sl St into the top of the Ch 2.
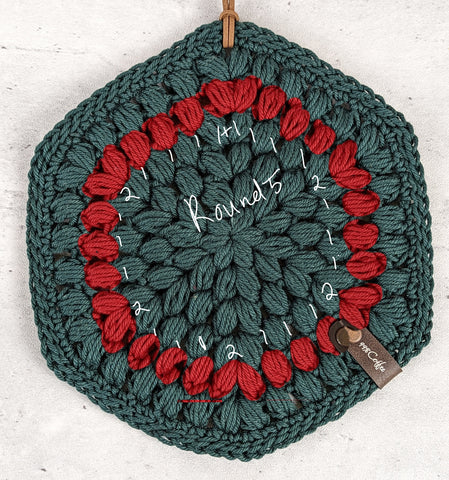
Round 5 [30 Puff Stitches]
Ch 2, 1 Puff St into the same St. * In next 3 Ch 1 spaces between previous round's Puff Sts, 1 Puff St. Into the next Ch 1 space, create 2 Puff Sts. Repeat from * until you reach the first puff St of the round. Create 1 more Puff St into the same space as the first puff St of this round to finish off, increasing this round by 6 total Puff Sts. Sl St into the top of the Ch 2.
Round 6 [36 Puff Stitches]
Ch 2, 1 Puff St into the same St. * In next 4 Ch 1 spaces between previous round's Puff Sts, 1 Puff St. Into the next Ch 1 space, create 2 Puff Sts. Repeat from * until you reach the first puff St of the round. Create 1 more Puff St into the same space as the first puff St of this round to finish off, increasing this round by 6 total Puff Sts. Sl St into the top of the Ch 2.
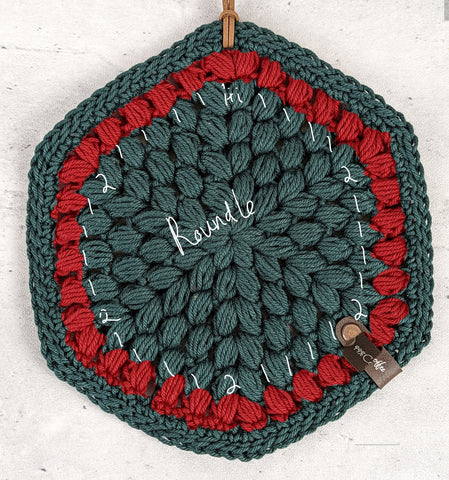
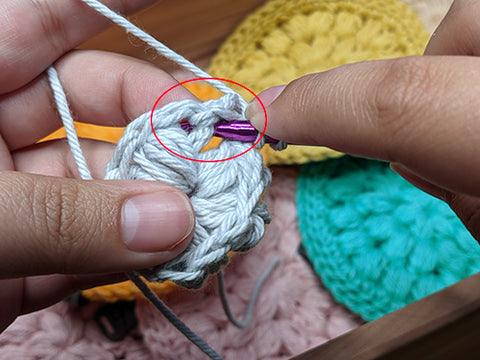
Optional: Take your 5 stitch markers and mark each Ch 1 space for each space with 2 puff sts. If you are not using stitch markers, locate the Ch1 space between each double puff stitch as shown below:
Rounds 7 and 8 are done in the normal part of your stitch, you will no longer just be working in the Ch 1 space between the puff stitches.
Round 7 [86 Sts Total]
Ch 1, SC into same St as Ch 1. * Continue until you reach the next stitch marker with one SC into each St. When you reach the Stitch Marker, remove the marker. Into the St where the marker was located, SC, Ch 1, SC. Repeat from * until the end of the round. In same St as first SC of the round, SC, Ch 1. Sl St into top of 1st SC of round to close off.
Round 8 [86 Sts Total]
Ch 1, in same St as Ch 1, Sl St TBL. Loosely Sl St TBL in each St around your project. Be sure to crochet loose enough to keep the project flat. When the last Sl St TBL is complete, either finish off the round with a Sl St into the first St of the round or follow my quick guide on how to finish with an invisible slip stitch.
Finishing Touches
Cut yarn and weave in ends!
Try adding on a quick loop by cutting a 12" piece of Faux Leather or cotton cord. Tie a quick knot and slip it through one of the corners of your project.
Alternatively, add in a SC loop on the final round of the pot holder. That is, if you even want a loop! You can use any material for a little loop at any point to put your own spin on it with your own style!
After weaving in the ends, make a few more or make some Fancy Puff Coasters to finish off your set!
Share:
Season's End Hat // Free Crochet Pattern
Lavender Fields - Free Keychain Pattern
2 comments
Thank you for the [aiiern
Hello, I just need to know how many loops on the hook for your puff stitches. 5, 7, 9, or 11?
———
99% Coffee replied:
Hi! I use the 5 loop version 😊 I just updated the blog post with that and put it on my list to fix that link, sorry about that!