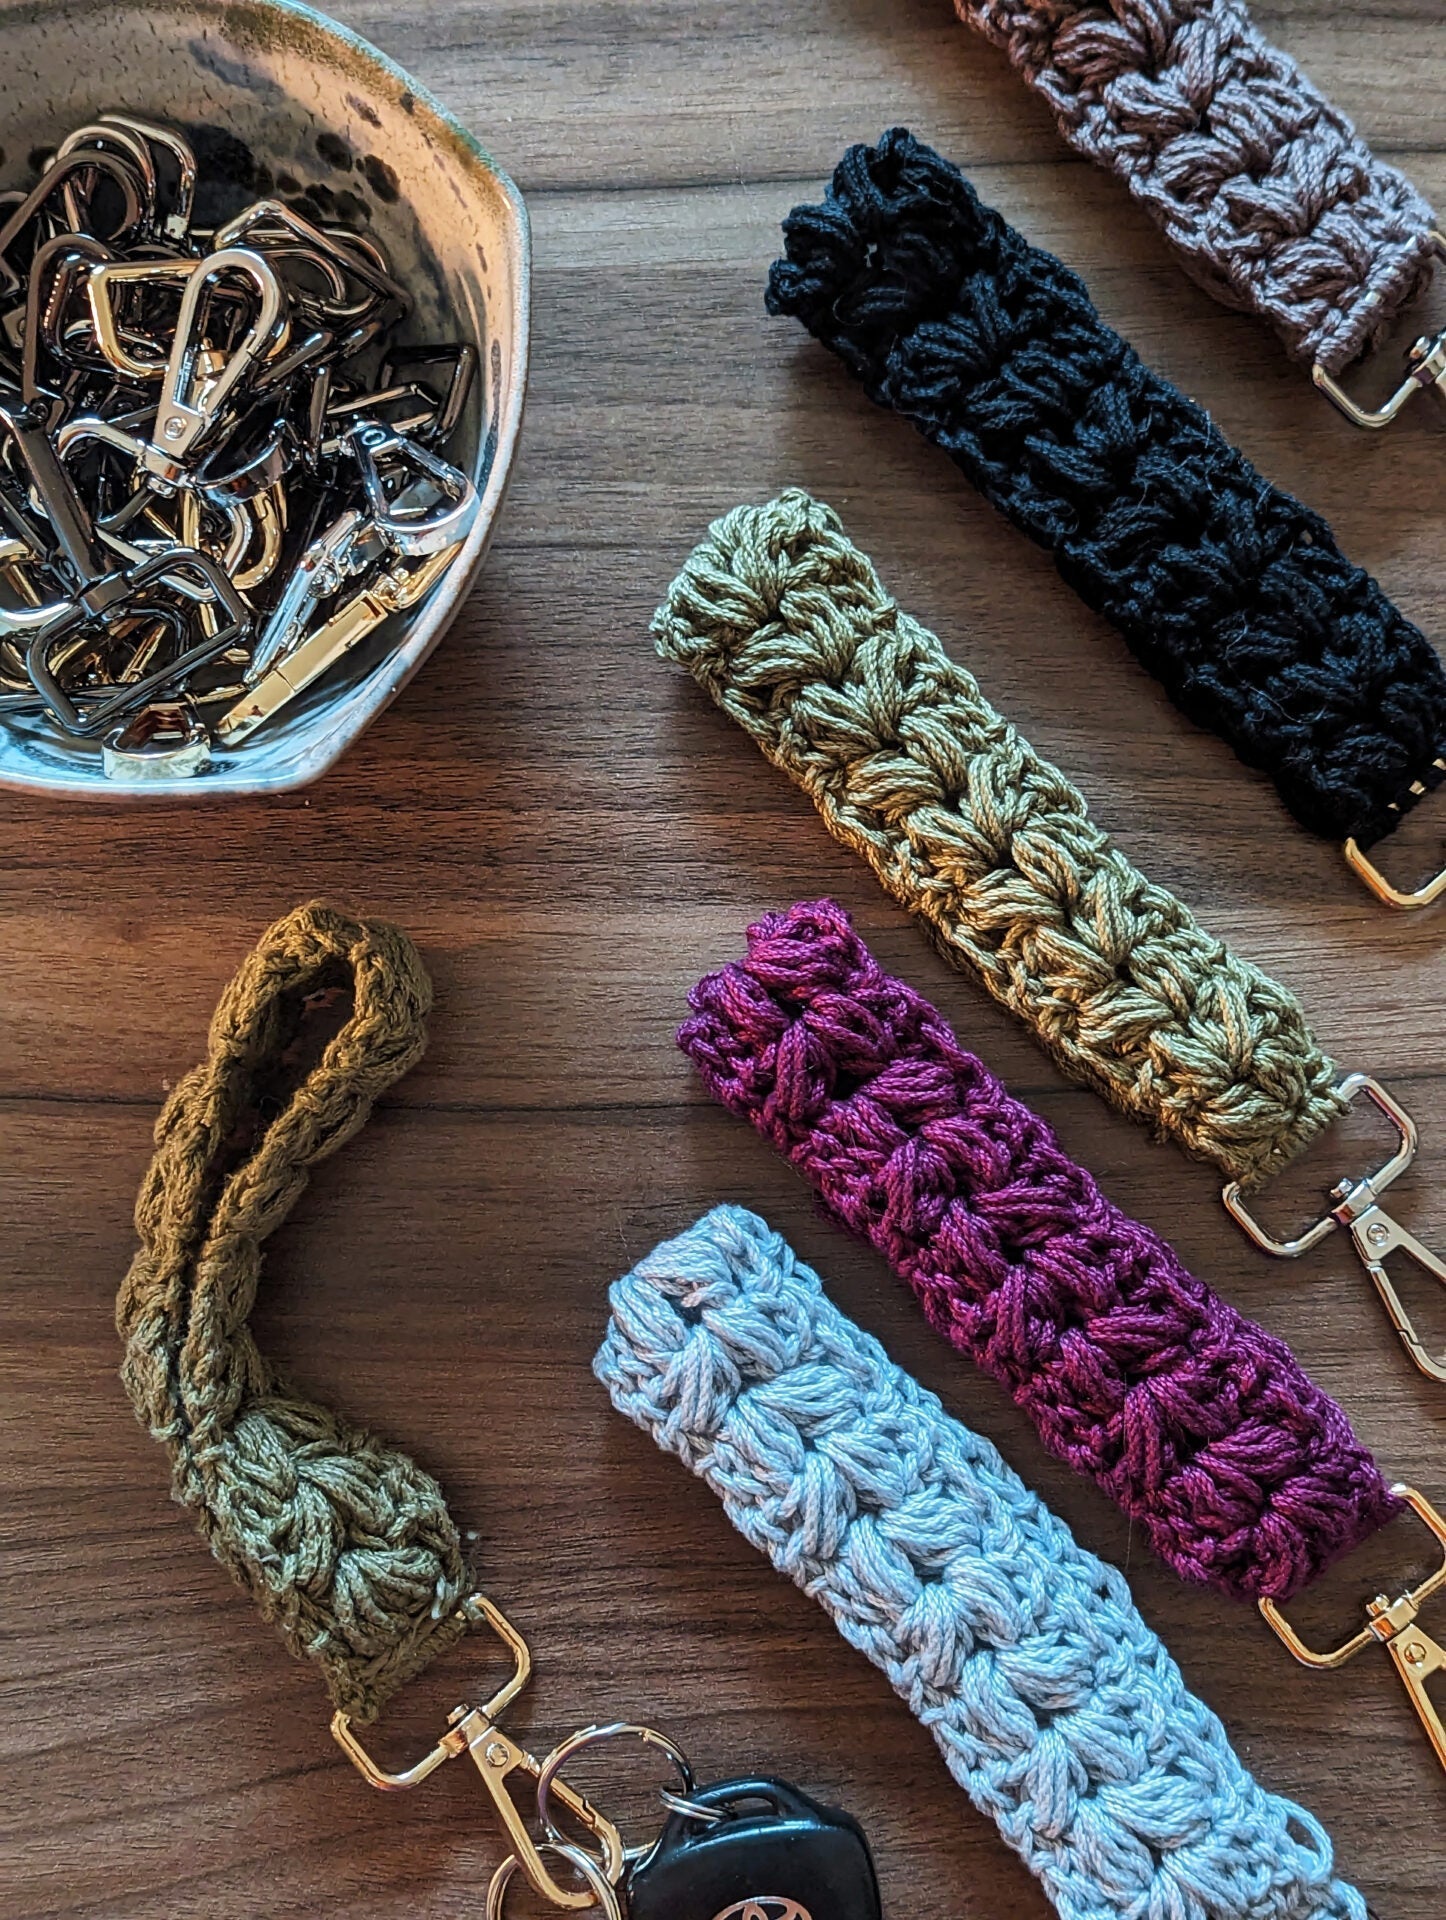
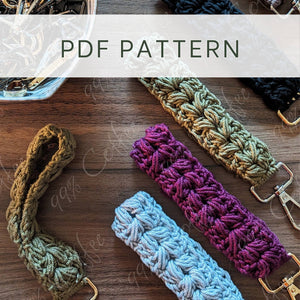
I am one of those people who hoard every bit of yarn that I can - from a just a few feet to a few yards, I have scrap yarn of every sort. Sometimes though, my scrap yarn stash can get a bit unruly.. that's what I pull out a few of my scrap yarn patterns and go to town!
These little keychains are a fantastic stash buster - with the smaller size using only about 15-20 yards of yarn, they make great gifts that aren't just quick to make, but also perfectly functional for whatever you need to carry close to you while you're out and about.
Materials
- 1 Skein of Worsted Weight Cotton Yarn
- Wristlet: ~16 yards of yarn total
- Lanyard: ~52 yards of yarn total
- 1 1" Swivel Clasp or preferred key ring (see note on hardware choices below)
- US H/5.00 mm Hook
- Scissors
- Tapestry needle
Regarding Hardware Choices
I have, personally, found it easiest to work with the hardware that has at least one flat side - also known as "D Ring" style lobster or swivel hooks. However, if you prefer to use a circular key ring instead, feel free to play with it to make your preferred style! Note, that with circular ones, your final product may turn out a bit more lopsided compared to the D Ring style ones that are shown in this pattern.
The two types I would recommend with this pattern are either the swivel clasp or lobster closure hardware. You can get these from a variety of outlets - from Amazon to bulk suppliers and craft stores, so there's sure to be something for your budget!
For this specific pattern, I would suggest sticking with 1" hardware, as this pattern should fit perfect with this type of clasp.
Pattern Notes
- Prior to beginning, please read through the pattern in its entirety!
- This pattern is written in US terms.
- There will be no starting chains at the beginning of each row - instead this will be replaced by a stacked single crochet to keep the project symmetrical.
- Any worsted weight yarn will work with this pattern, though I suggest using cotton or another easily washable fiber. I chose Lion Brand 24/7 cotton yarn because of its durability, but it's also super easy to spot clean if needed!
- While the materials for both the wristlet and the lanyard size state that a 1" D-Ring Lobster or Swivel Clasp is needed, feel free to adjust to your favorite keychain hardware. I would suggest a D-Ring simply because it's easier to work with and keep the finished keychain flat, but if you prefer an O-Ring or other piece of hardware, feel free to substitute for your favorite.
- On the final step, when sewing the project shut, you can choose to either sew it flat or flip one end and sew it together - this is up to your preference, I like to sew my wristlets flat and sew my landyards crossed so they lay on my neck easier :)
Special Techniques
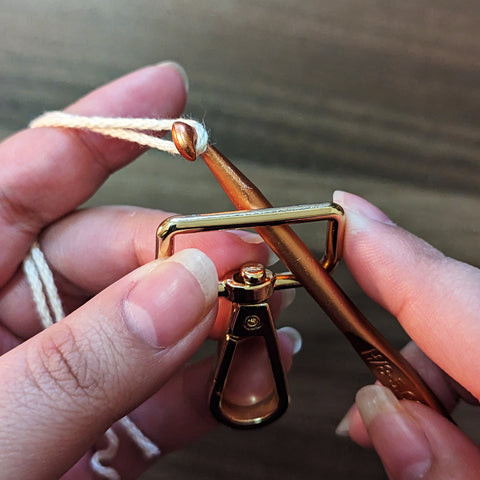
Crocheting into a D-Ring
- Holding your hardware in your left hand and your hook in the other, insert your hook into the middle of the D-Ring.
- Fold your yarn in half, leaving about a 5" tail on the tail end of your yarn and pull a loop through the middle of the D-Ring from your working yarn. Continue holding onto both the tail and working end of your yarn.
- Over the top of the D-Ring, yarn over, and pull through the loop you pulled up in step 2. Drop the tail of the yarn at this point.
- Continue working according to pattern in the same manner as above.
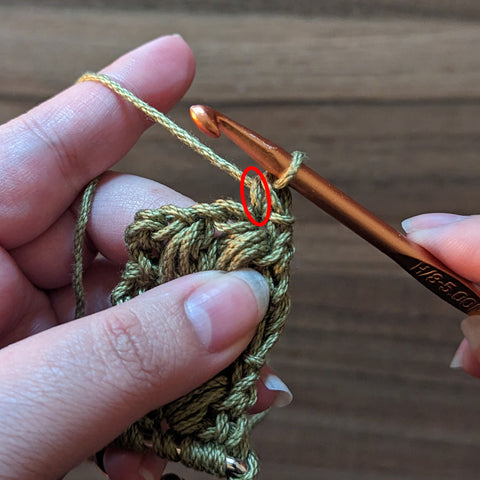
Stacked Single Crochet [StSC]
A stacked single crochet is used at the beginning of every row to keep the sides of the project looking as even as possible. To create a stacked single crochet, the following instructions can be used:
- Create a single crochet as you normally would
- Insert your hook through the left vertical bar of your single crochet (see picture below)
- Yarn over and pull through the first loop on your hook [2 loops remain]
- Yarn over and pull through both loops on your hook - your stacked single crochet has been completed!
Puff Stitch [PS] (3 YO Version)
If you've seen some of my old patterns, you probably know I love using the puff stitch - well, here it is again, but with a bit of a twist!
- Yarn over. Insert hook into designated stitch or space.
- Yarn over, draw a loop through the stitch.
- Pull loop to about the height of the stacked single crochet at the beginning of the round or as tall as the previous stitch.
- Repeat steps 1-3 two more times until there are 7 loops on your hook.
- Yarn over and pull through all 7 loops on your hook.
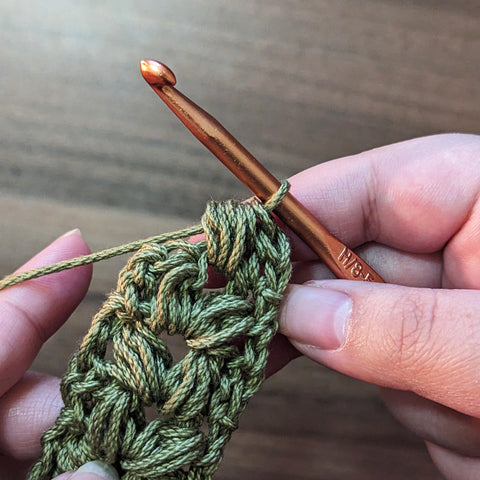
You'll notice after step 7 that there isn't a chain 1 at the end of it. This time around, I do not include the securing chain 1 to keep the keychain as even as possible between the two sides. Instead, follow the instructions in the pattern below for information on where to chain 1 and where to skip it.
Abbreviations
- Ch: Chain
- St(s): Stitch(es)
- Sk: Skip
- YO: Yarn Over
- SC: Single Crochet
- StSC: Stacked Double Crochet [See pattern notes - special techniques for info on this particular stitch]
- Puff St: Puff Stitch [See pattern notes - special techniques for info on this particular stitch]
Pattern
Starting Row:
Working inside of your D-Ring, Ch 1 using both strands of yarn to secure the beginning of your yarn to the keychain hardware. Drop the tail end of your yarn and continue working with only the working end of your yarn.
Create 5 SC into the D-Ring.
Row 2: In the same St, StSC, Sk 1 St, 1 Puff St into the next St, Ch 1, 1 Puff St into the same St as the last Puff St, Sk 1 St, DC into the last St of the row. Turn your work.
Get the Ad-Free PDF of this Pattern
Support my work by purchasing the ad-free PDF version of this pattern! With your purchase, you'll receive:
$3.50
- The Ad-Free PDF version of the Lavendar Fields Keychain Crochet Pattern
- Instant Digital Download on your chosen platform
- The Pattern written in U.S. Terms Only
- Pattern Support with Savannah via e-mail for any questions
Just want the free version? No problem, just keep scrolling!
Row 3: In the same St, StSC, 1 Puff St into the Ch 1 space from the previous row, Ch 1, 1 Puff St into the same Ch 1 space from the previous row, Sk 1 St, DC into the last St of the row. Turn your work.
(Wristlet Only) Row 4-21: Repeat row 3 until there are 20 total Puff St rows. The wristlet, when folded in half, should be around 5.5" in length not counting the hardware.
(Lanyard Only) Row 4-65: Repeat row 3 until there are 64 total Puff St rows. The lanyard, when folded in half, should be around 16" in length, not counting the hardware.
Finishing
Cut yarn, leaving a tail of about 10-12". Fold your project in half and bring the end of the project back to the beginning where it meets the hardware. Thread your tapestry needle and sew the two 5-stitch ends together. Weave in ends and cut excess yarn.

Share:
Fancy Puff Trivets - Free Pattern
Seamless Dish Scrubby // Free Crochet Pattern
1 comment
I highly recommend this well written pattern. Thank you!