With the middle of summer finally here, my patio is looking fuller than ever - tomatoes and cucumbers are ripening, flowers are blooming, and all my little seed starts for the Fall season are starting to pop up as well. With so much changing outside, it's easy to feel like the inside of my home is dull and stale compared.

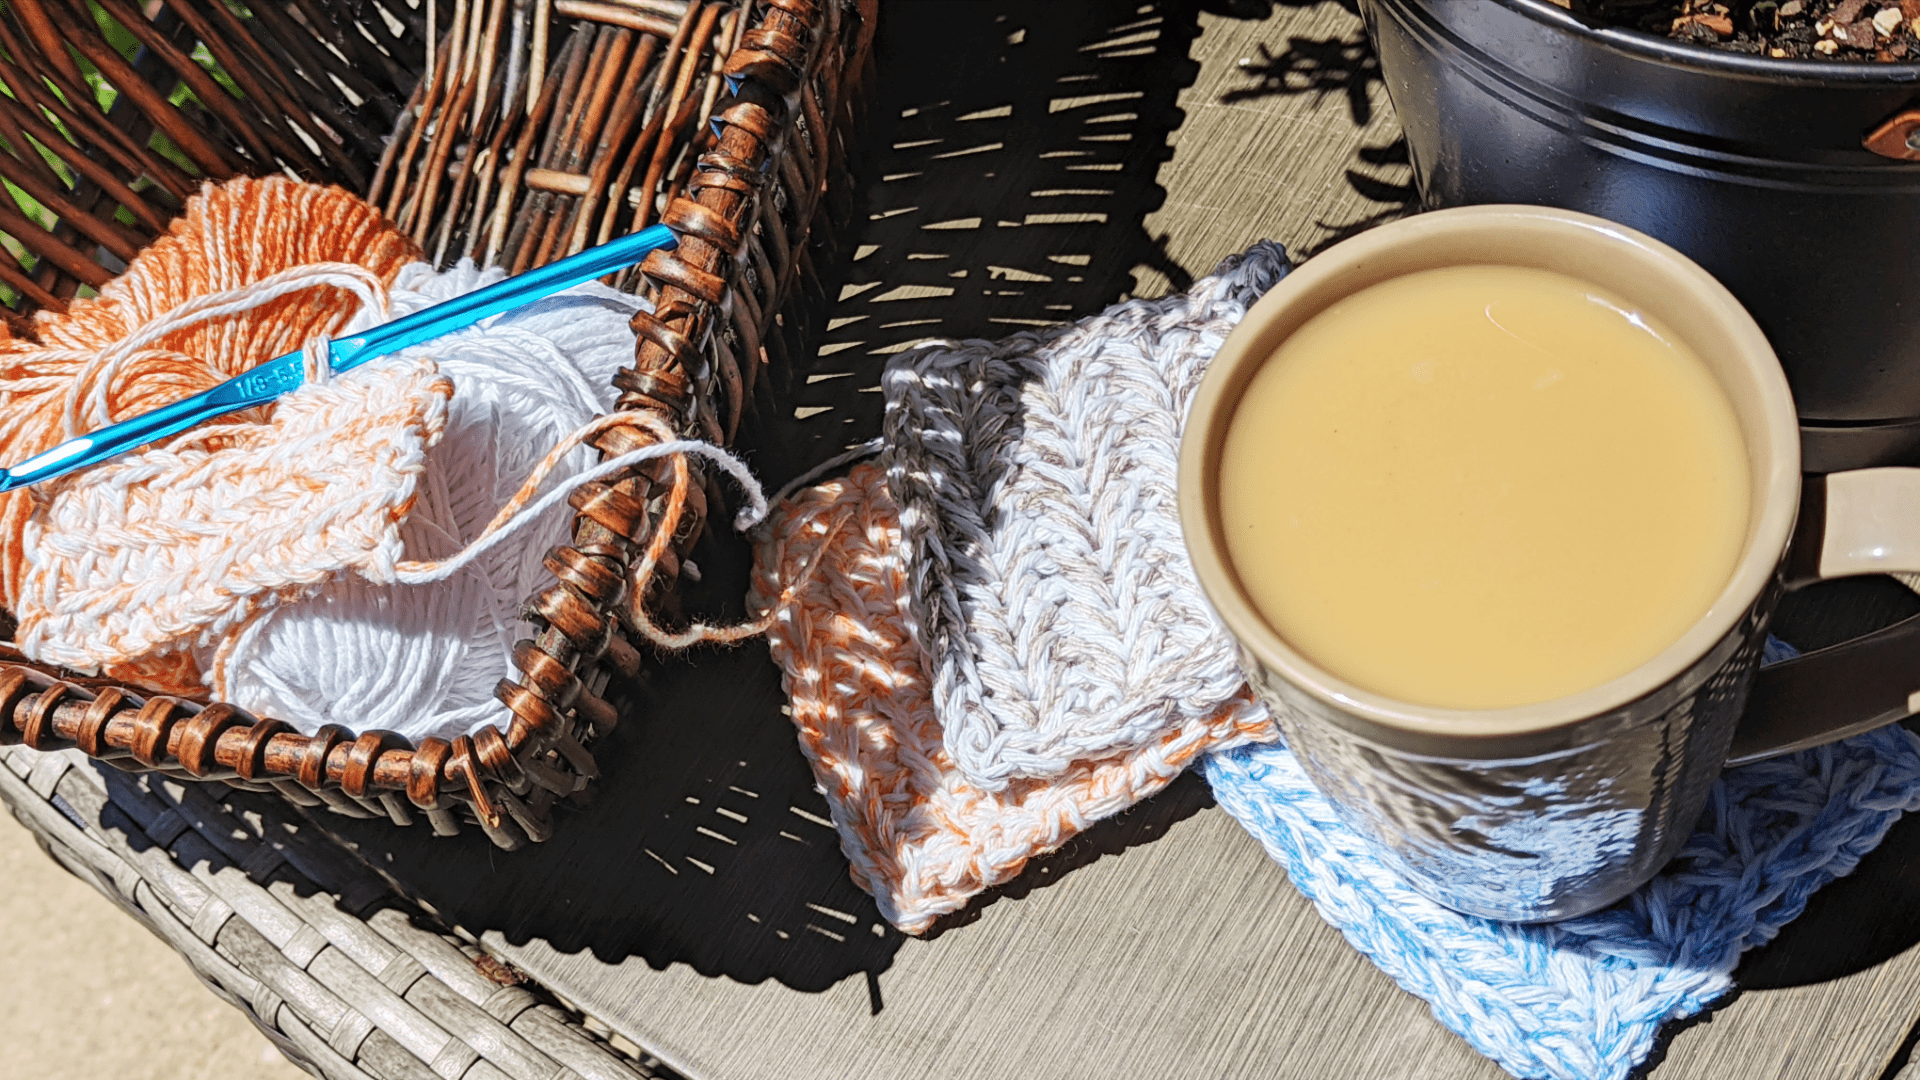
Whether you're looking to spruce up your patio or your living room (or any other room for that matter), these Modern Herringbone Crochet Coasters are the perfect addition! Made using the Single Crochet Herringone technique and 2 strands of yarn held together, these coasters come out thick, sturdy, and perfect for keeping your tabletop surfaces clean and water-ring free.
Materials
You will need the following:
- 2 skeins of worsted weight yarn
- For the marble effect, I used 2 different colors of Premier Home Cotton Yarn - Premier Home Cotton in White and Grey Splash
- You will need ~28 yards (25.6 meters) of yarn for each coaster - about ~14 yards (12.8 meters) per strand
- US I/9 (5.50 mm) Hook
- Tapestry Needle for weaving in ends
Pattern Notes
- Yarn is held double throughout the pattern.
- You will need 2 strands of 14 yards each - about 28 yards of yarn total for each coaster.
- The first stitch of each row is done as either a normal Single Crochet or as a Back Single Crochet - respective to the side you are working on (right or wrong side).
- Finished Dimensions: About 3.75" x 4"
Yarn Choices
Coasters, in general, don't need to be super heat resistant nor do they need to be flame retardent, as they are generally not coming in close contact with heat. They should be absorbant, however, for water droplets to not just fall off the finished project. I am using an 85%/15% Cotton/Polyester mix for my coasters, but you can also opt to use 100% cotton yarn or even play around with Acrylic.
I would suggest to stay away from wool due to felting danger. As coasters can come in contact with moisture often, they may felt if wool is used.
Techniques
The three techniques outlined below are used throughout the pattern. To help in showing exactly where to place your hook, I've included pictures showing where to place your hook and what direction the hook should be placed in (tapestry needle).
HSC (Herringbone Single Crochet) Right Side
- Step 1: Insert hook into lower bars of the previous single crochet
- Step 2: Insert hook into top 2 bars of the next stitch
- Step 3: Yarn over, pull yarn through the stitch (3 loops on hook)
- Step 4: Yarn over, pull yarn through all 3 loops remaining, completing your Herringbone Single Crochet (HSC)


BSC (Back Single Crochet)
The back single crochet is simply a single crochet done backwards - I'm not sure if this is the technical term for this, but the pattern will follow using BSC. If there's another name for this, let me know in the comments and I'll adjust the pattern as needed!
- Step 1: Holding yarn in front of your work, insert hook from back to front into the top of the stitch below your BSC stitch
- Step 2: Yarn over, pull yarn through the stitch (two loops on hook)
- Step 3: Yarn over, pull yarn through all loops on your hook, completing your BSC


BHSC (Back Herringbone Single Crochet) Wrong Side
Note that all work done on the wrong side is done from the back to the front unless stated otherwise. This can take some time to get used to, but once you have it, it's easy to complete!
- Step 1: Holding your yarn in front of your work, insert your hook into the back of the third leg of your previous stitch.
- Step 2: Continuing to hold your yarn in front, insert your hook through the back of your next Single Crochet stitch
- Step 3: Yarn over and pull up a loop of your working yarn. Pull through the stitch in step 2 - you should have 3 loops on your hook
- Step 4: Yarn over and pull through all 3 loops on your hook, completing your Back Herringbone Single Crochet (BHSC)


Abbreviations
- Ch: Chain
- St: Stitch
- SC: Single Crochet
- BSC: Back Single Crochet
- HSC: Herringbone Single Crochet
- BHSC: Back Herringbone Single Crochet
- TBL: Through Back Loop
- Sl St: Slip Stitch
Pattern
Note that instructions and pictures showing how to do the Herringbone Single Crochet (HSC) and Back Herringbone Single Crochet (BHSC) can be found in the pattern notes above.
Holding the yarn double, create a slipknot and chain 14.
Foundation Row (worked in back loop of all chain stitches): In second chain from hook, SC TBL. Continue HSC TBL in all stitches until the end of the row.
Working through the back loop of all chain stitches will give you a nice clean edge on both the beginning and final row of your work.
Row 1 (WS): Ch 1 and turn - make sure working yarn is on the side of the work facing you. In stitch just below the Ch 1, BSC. Continue the rest of the row with 1 BHSC in each stitch.
Row 2 (RS): Ch 1 and turn, SC in St below Ch 1. Continue the row with 1 HSC in each stitch.
Rows 3-7: Repeat rows 1 and 2 until 8 total rows have been worked, including the foundation row. Your last row will be on the WS.
Begin Border
The border of this coaster is completed with just a simple slip stitch border around.
Ch 1 and turn work, Sl St into same stitch. * Continue with 1 Sl St in each stitch until the next corner stitch. In the next corner stitch, Sl St, chain 1, Sl St. Repeat from * until you return to the first corner - Sl St into first corner.
Think about it this way: Each stitch gets one Slip Stitch, while corners get 1 slip stitch followed by a chain 1, followed by another slip stitch. This will help create sharper corners and help keep the work from folding in on itself.
After the final slip stitch has been worked, cut yarn and weave in ends to finish off your coaster. Block if desired.

And there you have it! Is this pattern extremely beginner friendly? Not really - the Herringbone Single Crochet takes some time to really figure out, but boy does it look fantastic!
Regardless, I hope you enjoyed this pattern and enjoy the finished project even more! As always, feel free to leave a comment or drop a message if you need assistance with patterns or have any additional feedback!
Share:
Lion Brand Truboo - A Review of Lion Brand's Bamboo Yarn
Faux Rib Winter Headband - A Free, Quick Pattern