Use this free pattern for the Stars & Stripes Potholder to bring some color to your summer festivities this year! Perfect for use with anywhere from 2 to 9 unique colors, it's truly customizable to whatever holiday is coming up and to suit any style kitchen.
- Use a pastel color palette for Spring & Easter dinner plans.
- Bring a bit of texture and simplicity to your kitchen with a neutral brown and beige.
- Celebrate the 4th of July with the ever-patriotic red, white, and blue, really bringing in the Stars & Stripes to your home.
No matter what color combo you decide on, it's sure to be a hit and used for years to come!

Navigate the Stars & Stripes Potholder Pattern:
Materials
- Yarn
- Sugar 'n Cream Navy (Color 1)
- Sugar 'n Cream Red (Color 2)
- Sugar 'n Cream White (Color 3)
- Size H Crochet Hook - US 8/5.00 mm
- Stitch Markers
- Tapestry Needle for weaving ends
Pattern Notes
- To increase or reduce size, follow the pattern repeat of 2+1 stitches.
- Because a pot holder needs to be washable and fairly heat resistant, Cotton or Linen yarn is preferable
- This pattern comes out to about 8"x8.5"
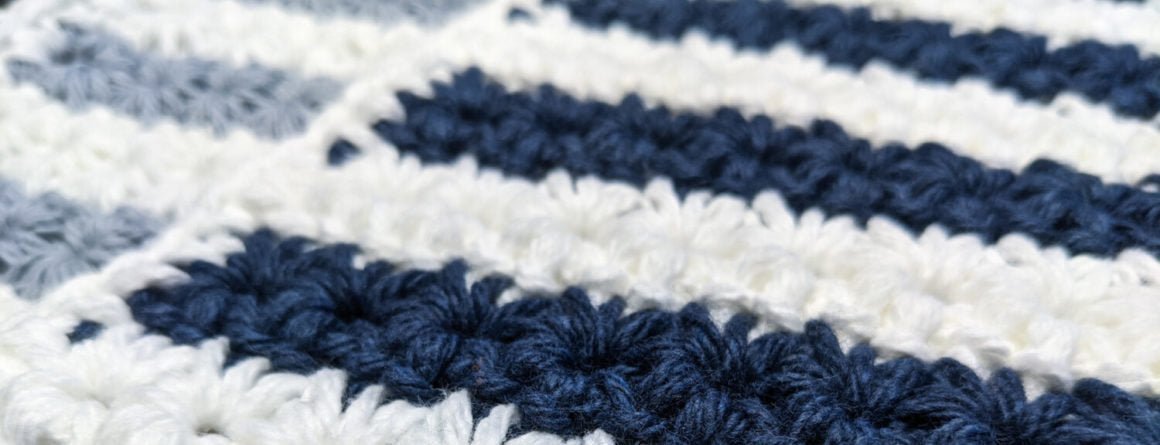
Stars & Stripes Pattern
Chain 30 with C1
Row 1: Starting in second chain from hook, SC through the back loop on all 29 foundation chain stitches.
Row 2 (and all even rows): Ch 2, pull up a loop in the front of the 2nd chain from hook and in the back chain (3 loops on hook), pull up a loop in each of the next 3 SC (6 loops on hook). Pull through all 6 loops, ch 1. * Pull a loop through center eye of previous star, through the back loop of the last leg of previous star, and through the same chain as the previous star (4 loops on hook), pull a loop through next 2 chains (total of 6 loops on hook). Chain 1. Repeat * through entire row, 1 HDC in same stitch as last star stitch.
Row 3 (And all uneven rows): Ch 1, SC to end of row, change colors
Repeat rows 2 and 3 until you can count 9 stars - 28 stitches tall.
Backing (Optional)
Chain 29
Row 1: Ch 1, SC through back loop on all 29 foundation chain stitches
Row 2-28: Ch 1, SC throughout all stitches
This backing will help to create a more heat-safe potholder for you to use to better protect yourself and your counters from hot pans and trays from the oven/stove.
If you're like me and mostly use these to protect your counter tops from hot trays rather than yourself, you can choose to forego the backing as well.

Layering & Border
Line up the front and the back of the pot holder - the top and bottom should each have 29 stitches while the sides have 28. Use stitch markers to hold the corners together, if needed.
Choose a corner for the loop to hang your dishcloth.
In the chosen corner, Sl St, ch 6, sc into same corner stitch, * sc across to the next corner, 3sc into corner. Repeat for the other 2 sides from *. On 4th and final edge, skip the corner stitches. 12 SC into the loop and SC into first SC after the loop. Weave in the ends and cut to finish off the potholder.
Congrats on your new Stars & Stripes Potholder!
You've completed your potholder! My favorite part of these potholders isn't just how great it looks in so many color combinations, but I absolutely love how thick it turns out!
If you made this potholder, share your projects below, share them on Ravelry, or tag me on Instagram at @99percent.coffee! I'd love to see what you make with this pattern and see them in use :)
If you have any problems or notice any mistakes in the pattern, please let me know in the comments and I'll try my best to answer them and fix any errors!
Share:
Making Waves Dishcloth - Free Pattern for the Beach Lover in You