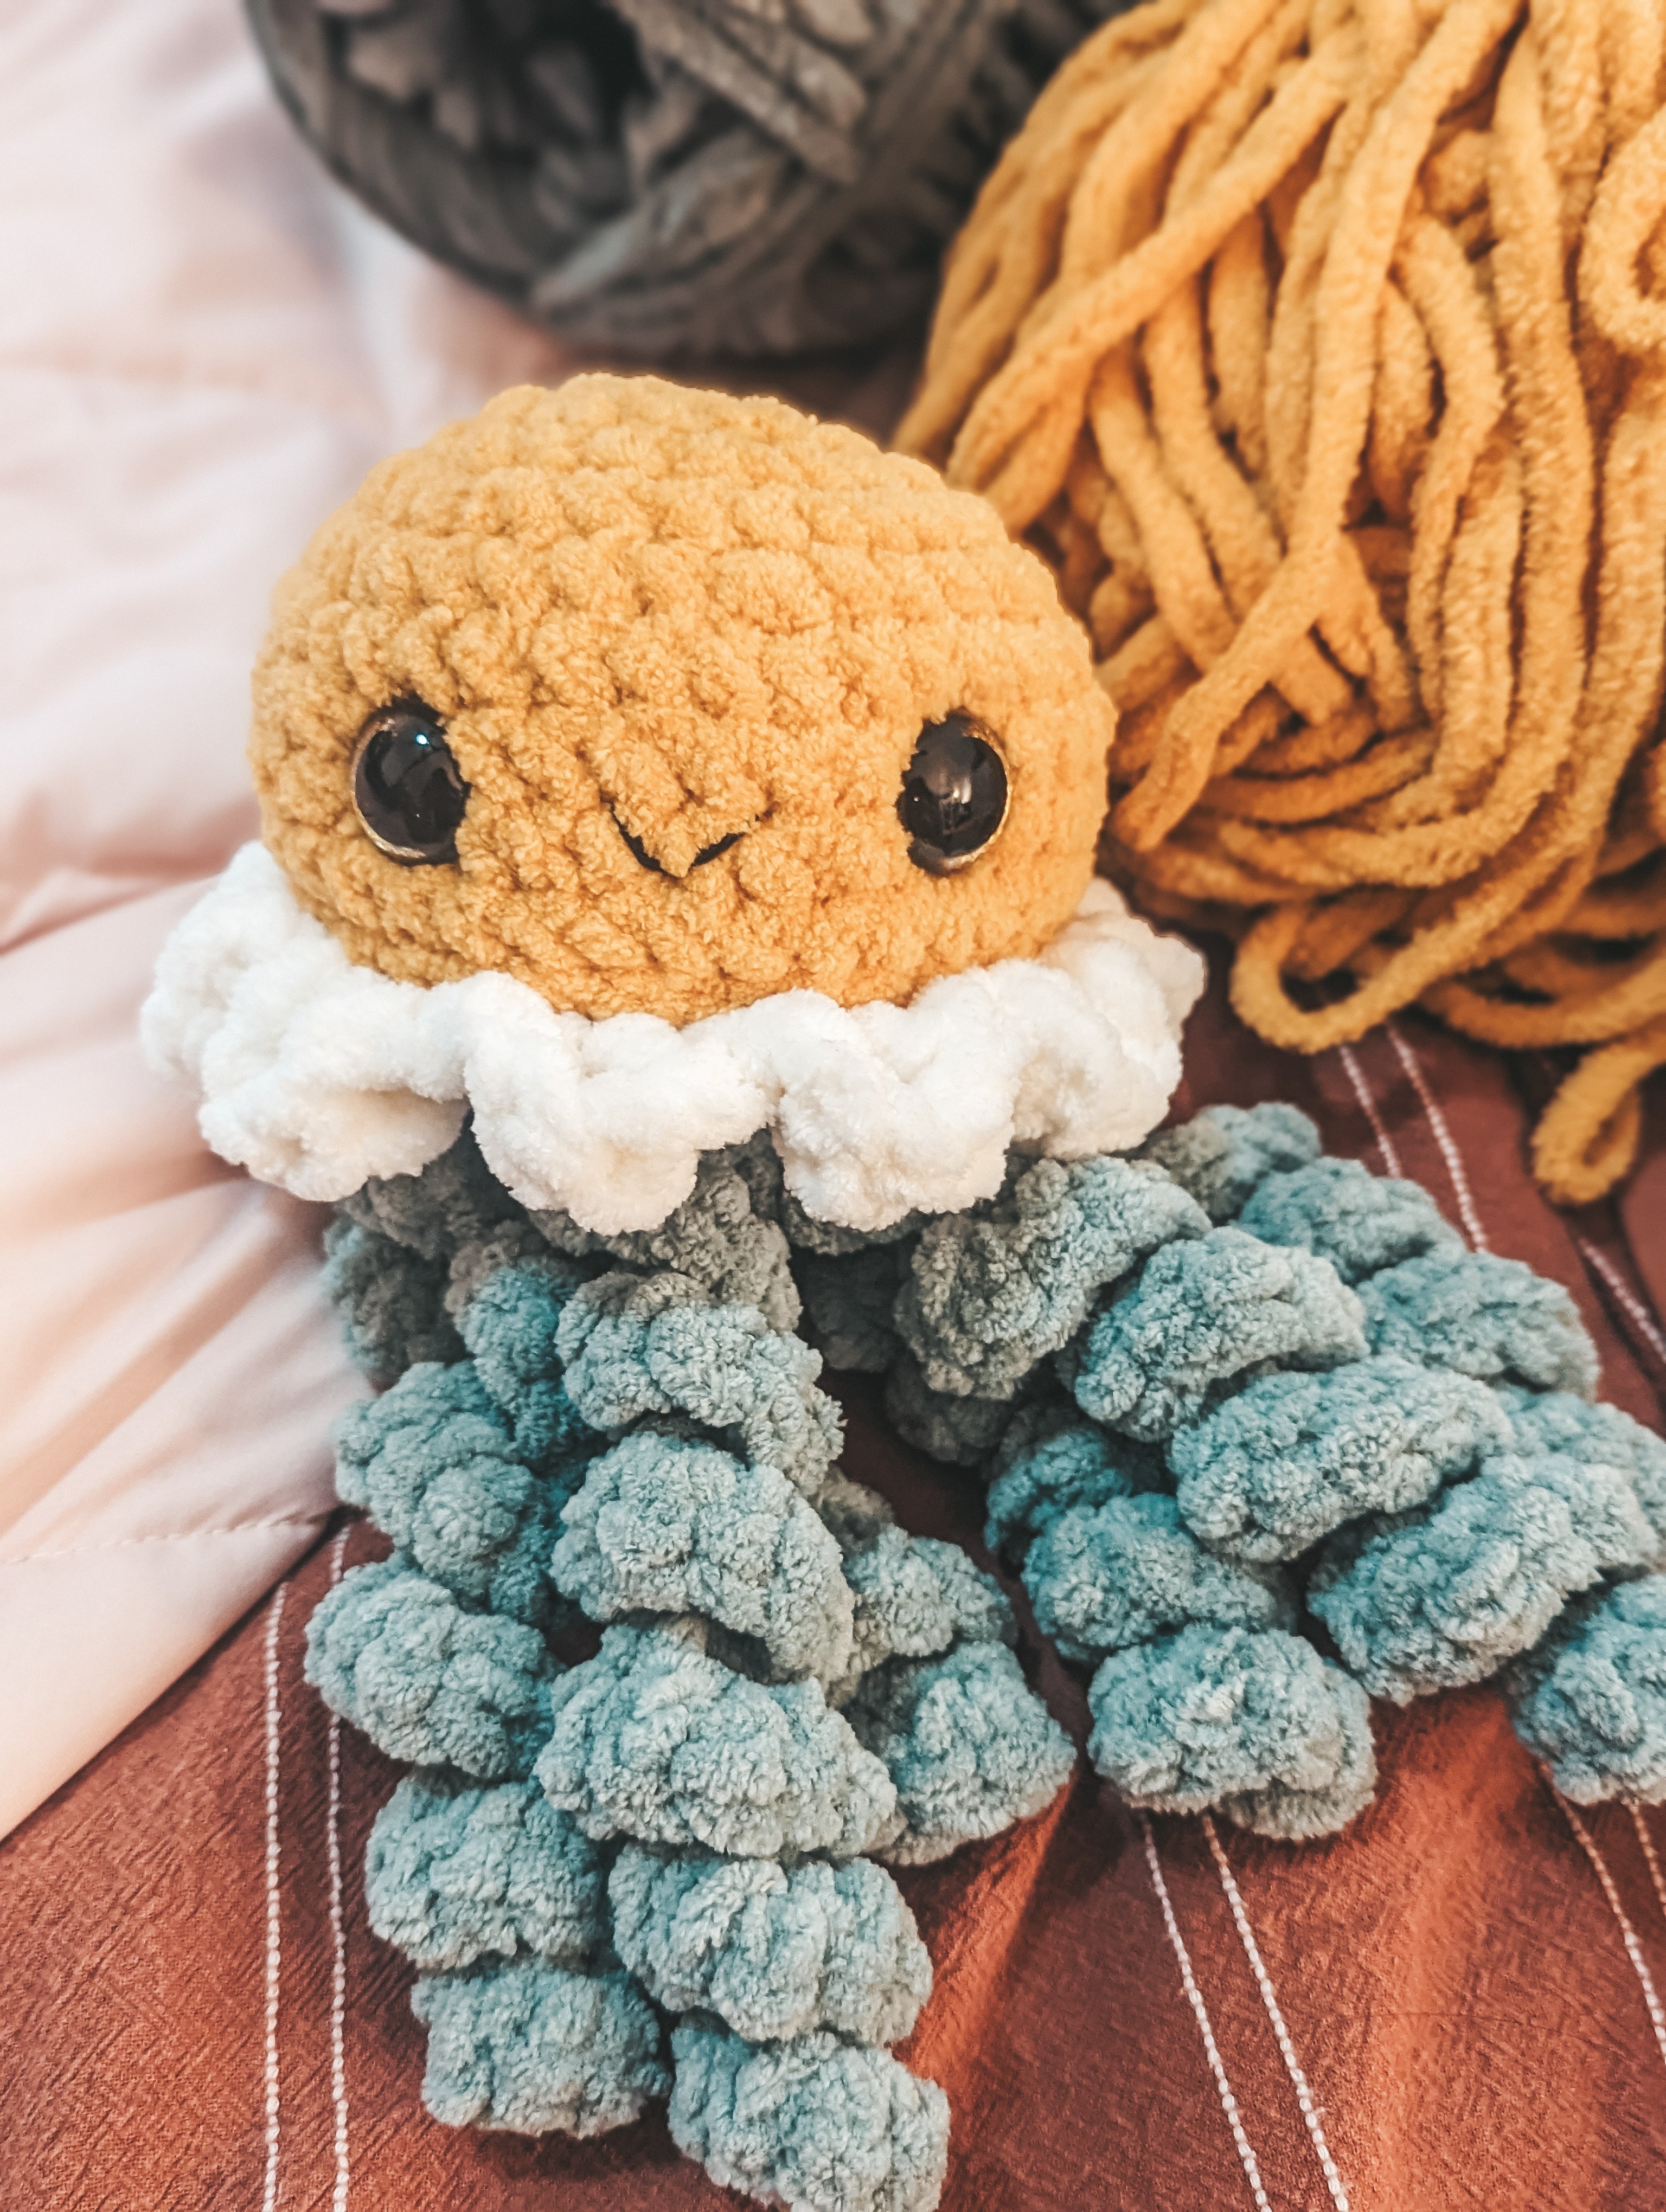
Flora the Jellyfish is the perfect, no-sew crochet project for spring markets, gifting, and even just as a desk buddy for yourself! With springy, soft tentacles and fun floral adornments, Flora is the perfect mash-up of a flower and jellyfish to help usher in spring this year!
Flora was intended to be added into my spring market lineup - this cuddly, springy toy is sure to be a hit with people of any age, and a great eye catcher!

Need to jump to a specific part of this section? Use the table of contents above to jump around!
Materials
-
Bernat Blanket Yarn
- ~30-45 g MC (Yellow) - Top of Body
- ~10-15 g CC1 (Pink) - Petals
- ~40-50 g CC2 (Green) - Bottom of Body and Tentacles
-
Black Worsted Weight Cotton Yarn, for Embroidered Details
- <1g
- 20 mm Safety Eyes
- Glitter eyes are used in this pattern example
- Poly Fill or Stuffing of Choice
Tools
- US K/10.5 - 6.5mm Hook
- Scissors
- Tapestry Needle
- Stitch Markers (optional)
Pattern Notes
- Due to some specialty stitches used and general knowledge in amigurumi, this pattern is considered to be intermediate difficulty.
- This pattern is written in U.S terms.
- The entire body of the pattern is done in a continuous round, do not slip stitch to close rounds or chain 1 unless instructed otherwise.
- This pattern is completely no-sew; petals and tentacles are added directly onto the body of the pattern after completion.
-
Use a stitch marker to better keep track of the beginning or end of your rounds.
- Use stitch markers to mark the post stitches for the tentacles on round 14.
- Stitch markers may also be helpful on round 12 to keep track of the first and last front loops of the round for the petals.
- Increase rounds are staggered to help keep a rounder shape on the body of the jellyfish.
- Color changes should be done by completing the last stitch of the round with the new color.
- When decreasing, use the invisible decrease technique to make the decreases blend in. If you are unsure about this technique, YouTube has plenty of tutorials for it!
Abbreviations
- Ch: Chain
- SC: Single Crochet
- DC: Double Crochet
- TR: Treble Crochet
- Sl St: Slip Stitch
- BLO: Back Loop Only
- St(s): Stitch(es)
- MR: Magic Ring
- DEC: Decrease SC
- INC: Increase SC
- MC: Main Color
- CC1: Contrasting Color 1
- CC2: Contrasting Color 2
Pattern
Body
With MC, Create MR.
Round 1 [6 Sts]: 6 SC into MR.
Round 2 [12 Sts]: INC around until all Sts are worked.
Get the Ad-Free PDF of this Pattern
Support my work by purchasing the ad-free PDF version of this pattern! With your purchase, you'll receive:
- The Ad-Free PDF version of the Flora the Jellyfish Amigurumi Crochet Pattern
- Instant Digital Download on your chosen platform
- The Pattern written in U.S. Terms Only
- Pattern Support with Savannah via e-mail for any questions
Just want the free version? No problem, just keep scrolling!
Round 3 [18 Sts]: * 1 SC, INC. Repeat from * until all Sts are worked.
Round 4 [24 Sts]: 1 SC, INC, *2 SC, INC. Repeat from * until 1 St remains. 1 SC.
Round 5 [30 Sts]: * 3 SC, INC. Repeat from * until all Sts are worked.
Round 6 [36 Sts]: 2 SC, INC, *4 SC, INC. Repeat from * until 2 Sts remain. 2 SC.
Rounds 7-10 [36 Sts]: SC around (4 rounds)
Round 11 [30 Sts]: 2 SC, DEC, *4 SC, DEC. Repeat from * until 2 Sts remain. 2 SC.
Insert safety eyes between rounds 8 and 9, approximately 8 Sts apart. There should be 6 visible Sts between the eyes when installed.

Change to CC2 (Green), fasten off MC.
Round 12 [24 Sts]: * 3 SC BLO, DEC BLO. Repeat from * until all Sts are worked.
Insert stitch markers into the front loops of the first and last St of round 12.
Begin stuffing the body.
Round 13 [18 Sts]: 1 SC, DEC, *2 SC, DEC. Repeat from * until 1 St remains. 1 SC.
Round 14 [12 Sts]: * 1 SC, DEC. Repeat from * until all Sts are worked.
Round 15 [6 Sts]: DEC around until all Sts have been worked.
Cut yarn, leaving a long tail to close the jellyfish. Finish stuffing firmly.
Use the front loops of round 15 to close the Jellyfish. Weave ends.
The body is now complete - continue to add petals and tentacles.
Petals
With the top of the jellyfish facing towards you, locate the front loop of the first St you marked on round 12.
Using CC1 (Pink), Sl St into the Front Loop found in the instructions above.
Starting in the next St, follow the instructions below. Each petal is a repeat of 3 stitches:
Stitch 1: Ch 1, DC, TR, TR, DC, Ch 1
Stitch 2: Sl St.
Stitch 3: Sl St.
Repeat Sts 1-3 around the whole Jellyfish until 1 St remains. Sl St.
There should be a total of 10 flower petals at the end.
Fasten off and secure, weave in ends.
Tentacles
Turn the project, so the top part (yellow) of the jellyfish is facing away from you, and the bottom (green) is facing towards you.
The tentacles are made in the posts of every other SC from round 14.
It may help to use stitch markers to evenly distribute the 6 tentacles around the bottom of the jellyfish.

Using CC2 (Green), Sl St into your chosen SC space.
Tentacle 1 [50 Sts]: Chain 26. In 2nd Ch from hook, * INC. Repeat from * until all Sts have been worked. Skip 1 St, Sl St into the next post of round 14.
Repeat Tentacle 1 (above) until there are 6 tentacles total.
Fasten off and tie the beginning and end tail in a knot to secure - weave in ends.
Final Touches - Embroidery
With the front of the jellyfish facing you, locate the direct center of the jellyfish between the eyes.
There should be 2 stitches between the two eyes - we will be embroidering the mouth through either side of these two stitches and the one directly below them.


Finishing & Tester Creations
With your Flora complete, be sure to tag me on Instagram and my other socials for a chance to be featured on my page! I love seeing all the projects made from my patterns and would love to see yours and how you put your own spin on it as well! ♥

Share:
Crochet Market Recap: Small Business Saturday
Kitchen Projects You Can Crochet in Under an Hour