The first time you make a hat, it may feel a bit daunting. You may be uncomfortable with determining the size or even be uncomfortable with figuring out the color combinations or a specific fit you're looking for. Like most other projects, hats can be a bit tricky at first to get just right. Personally, I never really focused on making hats because I was intimidated by making the right size. As I was messing with this pattern, I realized it really wasn't as difficult as I thought it would be! Now.. suddenly everyone in my family is getting a hat for Christmas.
I designed the fit of this hat to fit a standard 22" circumference head, about an adult medium, and plan to mess around with sizing to get other sizes written up and made available for this pattern. If you are knowledgeable in making hats already, feel free to resize and make some hats for all those kiddos in your family! Or people needing a larger size.. either way!
- 2 Skeins Lion Brand Wool-Ease Worsted Yarn (~98 g/227 yd)
- 2 Hook Sizes:
- US H/8 - 5.00 mm Hook (Body of Hat)
- US G/6 - 4.25 mm Hook (Brim of Hat)
- Darning Needle for weaving in ends
- Attachable Pom Pom OR Pom Pom Maker OR DIY Pom Pom (3-3/8")
Note: If you choose to use two colors, you will need 1 skein of each color of yarn

Main (Body of Hat) Color: ~53 g/~122 yd
Contrasting Color (Brim & Pom Pom) Color: ~45 g/~104 yd
- The finished hat measures about 7.5" tall and about 10" wide laying flat.
- Pattern creates an adult medium size hat.
- While the body of the hat is done in an alpine stitch, there are times where the stitch will not line up perfectly with the row below it. Ignore this and continue on with the alpine stitch relative to the row you're presently on. This will happen on rows after an increase (including some increase rows).
- The brim of the hat is made to be about 3.5" and is then folded over to create a doubled brim. If you prefer a single-layered ribbed brim, adjust the chain length for a shorter rib at the end of the pattern.
- Ch 2 of each row is counted as a stitch only after you have made the final Slip Stitch. The final slip stitch to close that round should allow the round to make stitch count.
- To re-iterate from the previous techniques information box, note that this pattern uses a slightly modified version of the Alpine Stitch. I as able to achieve the texture I was looking for by removing the SC row between each DC row for the alpine stitch, so I've decided to omit the SC row between DC rows for this hat.
Gauge
- Body of hat: 2" x 2" = 8 st, 6 rows
- Brim: 2" x 2" = 9 St, 10 Rows
Abbreviations
- St(s): Stitch(es)
- Ch: Chain
- SC: Single Crochet
- DC: Double Crochet
- FPDC: Front-Post Double Crochet
- Sl St: Slip Stitch
- MC: Main Color
- CC: Contrasting Color
In addition to the above abbreviations, the hat also uses a number of techniques.
Techniques
-
(Slightly Modified) Alpine Stitch
- Row 1: * DC, FPDC. Continue from * until end of row
- Row 2: * FPDC, DC. Continue from * until end of row
- Magic Loop/Ring: Youtube video by MJ Carlos

Body of the Hat
The body of the hat is worked up in the round using the Alpine stitch with increases on rows 1, 2, 3, 4, and 6.
With MC, create a magic ring, Ch 2, 11 DC into magic ring, Sl St into top of first DC (not the Ch 2) - [12 St]
Round 1 (Increase Row): Ch 2, FPDC into first St, DC into same St (1 inc), *FPDC into next St, DC into same St. Continue from * until end of the row, FPDC into Ch 2 from previous round, Sl St into first DC of round. - [24 St]
Round 2 (Increase Row): Ch 2, DC into same St as Ch 2.
* In next St, FPDC, DC (Increase 1), FPDC in next St
In next St, DC, FPDC (Increase 1), DC in next St.
Repeat from * until last St, FPDC, DC into Ch 2 Sl St of previous round, Sl St into first DC of round - [36 St]
Round 3 (Increase Row): Ch 2, FPDC into first St, DC.
* In next St, FPDC, DC (Increase 1), In next two St, FPDC, DC
Repeat from * until last St, FPDC into Ch 2 of previous row, Sl St into first DC of round - [48 St]
Round 4 (Increase Row): Ch 2, Dc into same St as Ch 2, FPDC, DC.
* In next St, FPDC, DC (Increase 1), In next three St, FPDC, DC, FPDC
In next St: DC, FPDC (Increase 1), In next three St: DC, FPDC, DC
Repeat from * until last St, DC, Sl St into first DC of round - [60 St]
Round 5 (Increase Row): Ch 2, FPDC into 1st St, DC, FPDC, DC.
* In next St, FPDC, DC (Increase 1), In next four St: FPDC, DC, FPDC, DC
Repeat from * until last St, FPDC into Ch 2 of previous row, Sl St into first DC of round - [72 St]
Round 6: Ch 2, DC into same St as Ch 2, FPDC, *DC, FPDC. Repeat from * until last St, DC Sl St into first DC of round - [72 St]
Round 7 (Increase Row): Ch 2, FPDC into 1st St, DC, FPDC, DC, FPDC
* In next St, DC, FPDC (Increase 1), In next 5 St: DC, FPDC, DC, FPDC, DC
In next St, FPDC, DC (Increase 1), In next 5 St, FPDC, DC, FPDC, DC, FPDC
Repeat from * until last St, FPDC into Ch 2 of previous row, Sl St into first DC of round - [84 St]
Round 8: Ch 2, DC into same St, * FPDC, DC. Repeat from * until last St, FPDC, Sl St into first DC of round - [84 St]
Note: If you get lost - remember, if the stitch you just finished is a DC, your next St will be a FPDC. At the beginning of each row, it may be easier to remember your first St should follow the pattern of the row below it. Meaning, if the first St on the previous row is a DC, you will work the next row starting with a FPDC and continuing throughout the round with the alternating DC and FPDC stitches.
Rounds 9-16: Ch 2, Continue in Alpine Stitch until all stitches have been worked, Sl St into first DC of round - [84 St]
Having a hard time counting rounds? Flip the hat inside-out and count the ridges! At the end, there should be 16 ridges, including the current/final row as a ridge.
Do not cut yarn, turn the hat sideways.
If you want a bi-colored hat, change your yarn to the second color here!
Brim of Hat
The brim of the hat is worked with yarn while still connected to the hat.
Remove H hook from Sl St, insert G hook. The brim of the hat will be worked with the smaller sized hook.
With CC (or MC if you're doing a single color), Ch 21. In 2nd Ch from hook, SC TBL, continue SC TBL in all 19 remaining St, Do not turn
The brim of this hat ends up being about 4.5" to 5" and is meant to be folded over for a double brimmed hat. If you prefer to have a shorter single-brimmed hat, shorten the beginning chain to about 10 or however many you need to get your desired ribbing length.
Looking at the edge of the body of the hat, insert hook into next edge St from current SC Chain, Sl St, Sl St into next St and turn work

*Sk 2 Sl St, SC TBL into next St, continue SC TBL until end of row, Ch 1, Turn
Sk Ch 1, SC TBL into first SC, continue SC TBL until end of row, insert hook into next edge St, Sl St, Sl St into next St, and turn work
Repeat from * until all but one St of the body of the hat have been worked, ending at the bottom of the brim. Ch 1 and turn.
Flip the hat inside out, and hold both the beginning and working row of the SC rib together, with the working side facing away from you. insert hook into both loops of first St on the beginning side and into the same St on the working side. Sl St the two sides together across the remaining St, Ch 1 and cut yarn after all Sts have been seamed up.
Flip the hat right-side out and fold over the brim of the hat towards the outside so that the brim doubles up, creating a bit of a pocket on the outside of the hat.
To finish your hat, weave in your ends, wash and lay flat to dry (or wash/dry according to yarn instructions). Now you've got yourself a super cozy hat ready to go for all your winter activities!
Pom Pom
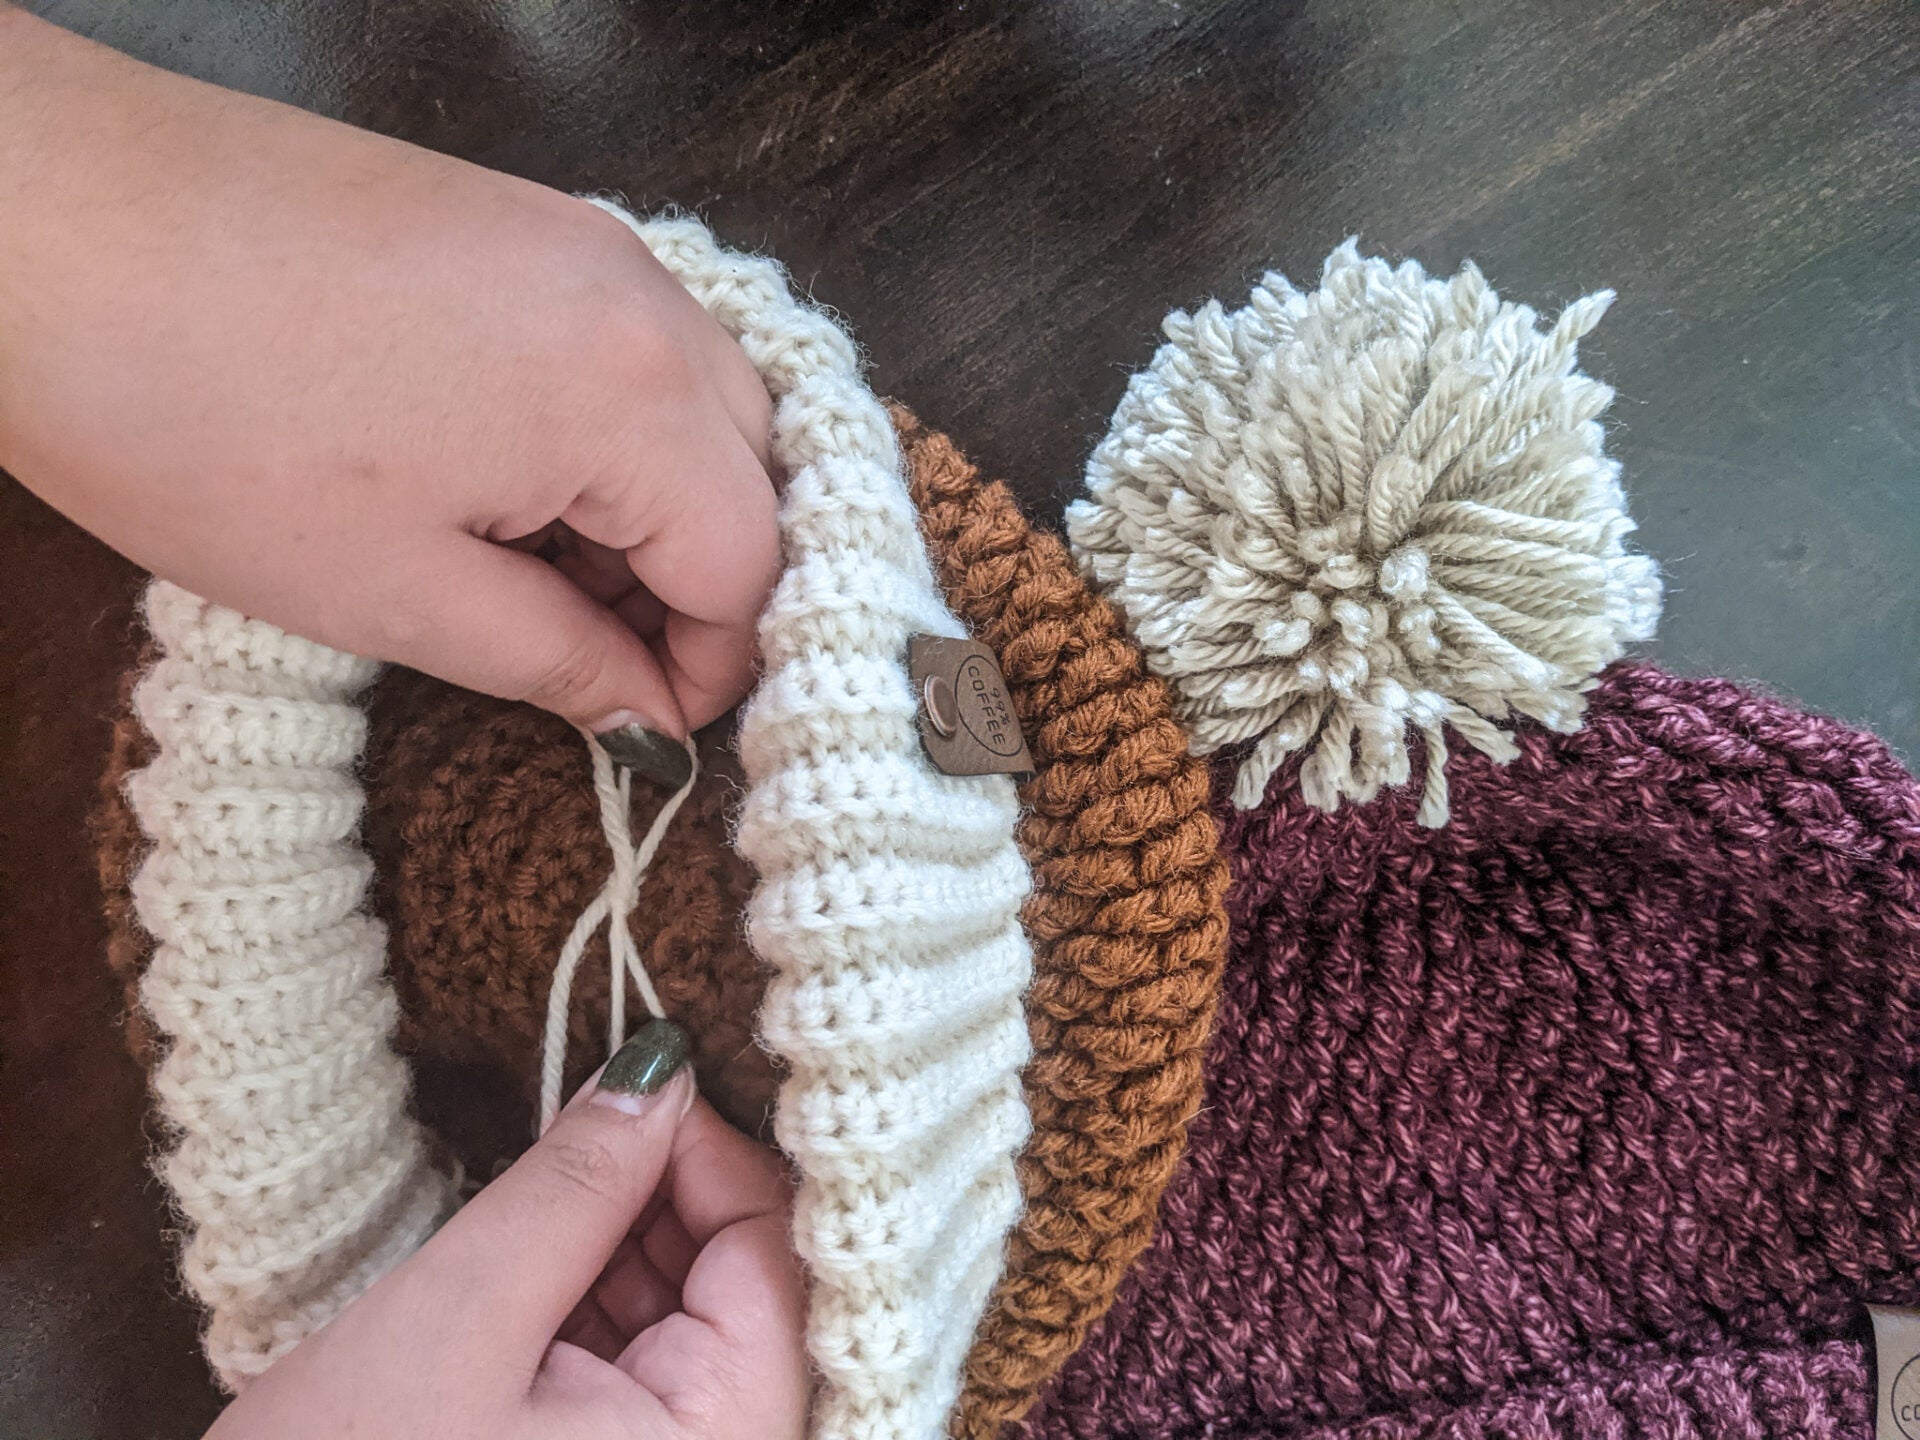
After the hat has been washed and blocked, don't forget the pom pom! Take your attachable pom pom and tie it inside the hat on top of the magic loop at the beginning of the body of the hat. I like to tie it in a single bow inside and cut the long excess string so that the pom pom stays removable for future washing, but if you'd like to attach it more permanently, you sure can do so as well.
Tags
I normally like to put my tags so they're on the right side of the hat on the top of the brim, but feel free to play with placement to where you like it best! If you don't have a tag want to put on them, worry not! These look great with or without tags and your recipient will love it all the same.
I hope you enjoyed this pattern and the finished product as much as I have! If you make this pattern, tag me at 99percent.coffee on Instagram! I'd love to see all the beautiful hats and color combinations everyone comes up with!


Share:
Lion Brand Heartland Yarn - A Review of Lion Brand's Acrylic Yarn
Fancy Puff Coasters // Free Crochet Pattern